

Do you like a challenge? Try something difficult—something most culinary chefs in town can’t do, but pretty much any pastry chef mastered back in cooking school. In the ongoing battle between pastry and savory chefs, piping and decorating represents the greatest weapon in the arsenal of the pastry department. Any chef worth a damn can make a reasonable selection of pastry items—enough to fill a menu when needed, but try asking them to decorate a plate with a simple happy anniversary message, and you’re in for good laugh.
Fine decorations, and detailed writing on cakes and pastries, are done with paper cones made from parchment paper (you can also use a paper cones to decorate cookies for any of the many upcoming holidays). Cones are tricky to make and perhaps even trickier to use. If you have the knack for precision, or have mastered origami in grade school, or a simple desire for industry bragging rights, get some parchment paper and give it a try.

1. Fold a full sheet of parchment in half. Try to make all your folds as perfect as possible. Line the edges up and make a firm crease.
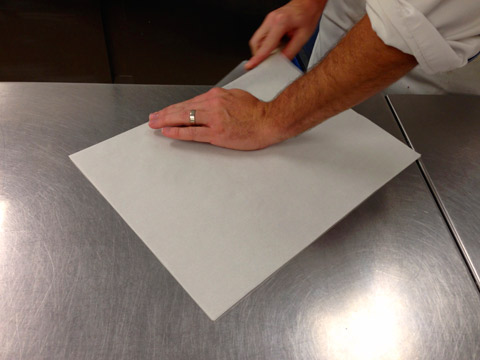
2. Cut the folded sheet along the crease. Try to make the cut as straight and perfect as possible.

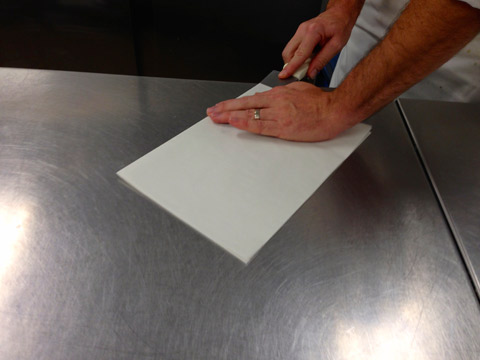
3. Fold the half sheet in half again, making a nice firm crease. And again, carefully cut along the crease, creating quarter sheets. (Until you get the hang of good folds, creases, and cuts, I recommend you only cut individual sheets at a time, not multiple layers as shown in the pictures. Small mistakes will magnify with each subsequent fold and cut.)
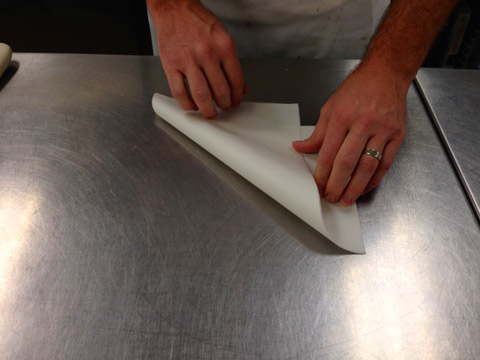

4. Now fold the quarter sheet again in an offset diagonal, creating a shape for which I seem unable to come up with an adequate description—see the photo. Again make a firm crease and cut along that crease.

5. You should have a piece of parchment shaped like a triangle with a missing corner. Lay the triangle with the pointed end facing away from you.

6. Roll the blunted end of the triangle (the end with the missing tip), forming a cone focused on a point opposite from the top of the triangle.

7. Pinch the cone to hold the form in shape and roll the rest of the paper around to complete the cone.

8. Now, with your thumb pull the end flap of parchment away from the tip, tightening the roll as you pull.
9. Fold the remaining flap over the rim of the cone and crease it to hold the cone in place.

If you’ve done everything correctly, which you most likely won’t have on the first attempt, you should a have tight cone with a sharp point. The seam running down the outside of the cone should line up to a corresponding line on the inside of the cone.
Fill the cone halfway with a decorating medium of your choice. Some options include royal icing and chocolate sauce. With a scissors, snip off the tip to allow the icing or sauce to flow out with some gentle pressure.
Some pro tips
Don’t over fill. Half is plenty. Full cone equals sloppy mess.
Don’t try to refill a cone. Single use is all you get.
Plan to throw out your first few attempts at cone making.
Wax paper will not work. It’s not sturdy enough.
A pro admission
As to my skill set regarding pastry decorating, those are not my hands in the pictures.


